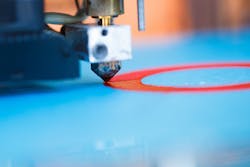
Over a year ago, we set out with an ambitious venture on our hands. The goal was to deliver six form factors each containing 11 mechanical components totaling 34 products, all within a span of 12 months. A saving grace for us in this undertaking was 3D printing. When building an advanced video surveillance camera from scratch, balancing electrical, software, and mechanical engineering has to be a very careful undertaking. Any slight change to the printed circuit board (PCB) can result in a mechanical hardware change. So development in parallel is a challenge.
Why We Did All of Our 3D Printing In-House
Outsourcing 3D printing it can cost up to $1000 per run (per form-factor) and can take up to one week. At that rate and cost, it would have been imperative that the design be nearly finalized or else we would have found ourselves in an expensive holding pattern. So our first initial design would have cost us a minimum of $6,000. Between preliminary design and alpha-prototype, we had around five versions of all form-factors totaling $30,000 saved.
We found doing our own 3D printing allowed us to react to mechanical changes quickly and cost effectively. For example, cable management and mounting options were both of focus to us in the design allowing for installers to have flexibility as to where and in which environments to mount our future product. Although our outlined criteria submitted to our mechanical engineer was clear, the interpretation in schematic design doesn’t always translate. Thanks to 3D printing mechanical design, however, we caught this interpretation which allocated the cable management to connect the outer dome and base camera together with the Ethernet dongle, making it a strain for the user to mount and adjust the gimbal. If we had actually prototyped all six form-factors from this point (assuming two times per form-factor) the cost would be $8,000 for each totaling $48,000.
Purchasing Our 3D Printer and Material
We could have easily spent more than $10,000 or we could have also gone the cheap route and purchased a sub $400 printer from Home Depot , but we needed to make a decision based on the following variables: Print quality, ease-of-use, build quality, reliability, failure rate, customer service, online-support community, running expenses, compatibility with our mechanical engineers software (Solidwork), and finally print material.
If you want to actually assemble all the individual mechanical components to represent a “finished-product” then you need to accurately decide on what printed material to use before choosing your printer because some printers don’t support all materials while others specialize in them. We chose ABS (Acrylonitrile Butadiene Styrene) over PLA (Polylactic Acid) since we needed to assemble all components we required both strength and flexibility. Click here to read a good article on the pros and cons of AVS vs. PLA.
Knowing full well that there would be some defects and a learning curve associated with the purchase, we decided to go with a “middle of the road” purchase, costing us around $2,000 not including materials. Our purchase allowed us to print most of our mechanical components in one to two days.
Once I got the fully-assembled 3D printed model in my hands, I had to caution myself from being unsatisfied because the quality of powder-coated metal is a very different texture. The printed model feels cheap and somewhat flimsy, and because we focus on having a quality product, it was difficult to temper disappointment. So you really have to look and observe with your “engineer” pair of glasses (I use that term as loosely as possible when referring to myself) and measure usability and size as opposed to cosmetics.
Alpha and Beta Prototypes
Eventually we were at the point of needing to create an actual working prototype with powder-coated metal, polycarbonate, fully functioning PCB, heat sync, storage, heater/blower, and optics. The goal for us was to get the product production-ready while working out final mechanical changes and pre-certifying the products for IP67, CE, FCC & UL certifications. This experience almost brought a tear to my eye as the difference between 3D-printed and metal is truly night and day, and, really, the beginning of bringing our product to life. Seeing something you’ve been thinking of and developing with a team of people take its true shape is an unforgettable feeling. That being said, even within our alpha prototypes, we still found issues on the seal and had to go back to the drawing board in some respects, by adding more density and an additional layer (IP66 was not good enough).
Following alpha there was six to eight weeks of additional trial-and-error in changes to the PCB that affected the mechanical design, as well as my push for making our product as small as possible considering all the heavy electronics built inside (over 940 components on our main PCB) not including sensor PCB. A serious consideration of future cost is assembly time. If our future assembly line, for example, takes 30 minutes versus five minutes to assemble (and disassemble, for trouble-shooting) then we have incurred a larger per-unit cost. We estimate because we strategized a focus on assembly of our 3D printed models we saved at least $2 per-unit and $20,000 on our first production-run of completed products.
Cost Savings Recap:
- In-House vs. Outsourced Service: $30,000
- Human Error & Trial-and-Error: $48,000
- Assembly/Disassembly Manufacturing Costs: $20,000
- Total: $98,000
All things considered, there were plenty of incidental costs our 3D printer saved us along the way which put us well over the $100k mark. Focusing mostly on time-to-market, and I would highly encourage any serious engineering team to make this investment.
I wish I could tie a nice bow at the goal-line of our development story, but the fact of the matter is, even as I sit here today, our team is entering the tooling-process phase (costs upwards of $200K). There is still further mechanical engineering that needs to be completed to finalize minor changes for production-ready mechanical components. Although, we feel strongly that the next four to five months is the home-stretch of meeting our goal (six form factors, 11 mechanical components, 34 products in 12 months) I could only wonder where we would be without our new found friend, the 3D printer.
About the Author: Thomas Carnevale is the founder and CEO of Sentry360, a technology company focused on delivering the best quality evidence at the lowest total cost of ownership to any video surveillance system. Mr. Carnevale is an active author, speaker and advisor in the security industry- consulting for major investment funds globally and plays a role in developing solutions focused on the end-user experience.


