above the surface, and aim the camera 100 feet (30.48 m) toward the horizon for every 10 feet (3.05 m) that the camera is mounted above the surface.")
Tracking individuals throughout wide, open-air spaces without blind spots can be challenging. In certain applications, such as a retail, banking and other commercial environments, it is essential that from the time a person enters a monitoring area, every movement is captured on video surveillance.
However, as advanced as conventional IP cameras have become, it is still a challenge to capture a full 360-degree view, even with multiple fixed cameras and no blind spots. Although PTZ cameras offer 360° surveillance, they can miss important events in another part of the coverage area, as they capture only a small portion of the entire scene. PTZs can be pointed in the wrong direction when an incident occurs resulting in a lost opportunity for capturing video surveillance; therefore, as more applications require detailed 360° situational awareness, panoramic cameras have risen to prominence to meet this demand.
Panoramics, once considered a “specialty” camera, offer cost efficiencies that make them appropriate for a range of mainstream video surveillance applications. In the past, for example, multiple cameras had to be painstakingly positioned to cover an entire parking lot or stadium. Today, using one panoramic camera for similar coverage requires fewer software licenses and less network infrastructure, cabling and power supplies for better cost savings.
Panoramic cameras not only minimize the number of cameras needed for a higher return on investment, but are streamlined for aesthetics and add increased capabilities and performance — a true benefit to any security operation.
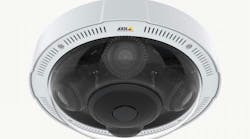
Panoramic cameras are typically available with 180° and 360° imaging capabilities and two variations: a single fisheye lens, or a single housing that encompasses multiple camera sensors. Fisheye lenses produce a wide panoramic or hemispherical image with some distortion, although video processing software can reduce distortion levels. A multi-sensor camera uses multiple individual cameras to deliver separate images or uses video stitching algorithms to deliver seamless panoramic views, typically between 180° and 360°.
Installation Tips
A single panoramic camera requires some special attention during installation and commissioning to ensure that they capture the largest area and deliver the best possible video quality. Here are five tips to help with ease of installation and commissioning:
1. Placement: It is vitally important to understand the end-user’s expectation for the technology, including the level of details and clarity desired. Ensure the camera is mounted in heavy-traffic areas in open spaces, and avoid placing the camera in view of a large obstruction or a constantly moving object. For 360° views, do not mount the camera in a corner.
2. Mounting: Determine a proper mounting area that will capture the application’s requirements. Decide the quality of the image that the application requires and calculate accordingly. Is detection-level surveillance adequate or does the application require identification-level images? Results will vary depending on how high the camera is mounted and how far away the subjects are from the camera. Mount the camera at least 15 to 20 feet (4.60 m to 6.10 m) above the surface, and aim the camera 100 feet (30.48 m) toward the horizon for every 10 feet (3.05 m) that the camera is mounted above the surface. This ratio will minimize image distortion and reduce scene curvature. Keep in mind that for every 10 feet that the camera is mounted above the ground, there will be a 10-foot blind spot below the camera. For example, a camera mounted 20 feet above the ground should be aimed 200 feet toward the horizon and will produce a 20-foot blind spot below the camera.
3. Tools: Use accessories and installation hardware appropriate for the environment. Cameras in outdoor applications should be rated to IP66 or greater and use a conduit to enclose and protect wiring. Build a test bed to confirm that your customer’s expectations are met and that all parts of the system — camera, switch, VMS server — work together.
4. Resolution: Define the image quality required and ensure the end-user’s expectations are consistent with the output quality. Test shots and live demos will help minimize potential errors or unrealistic expectations. To determine the proper resolution level for the camera, first measure the distance from the camera’s installation site to the identification zone, which is the maximum distance that you want to view. Next, establish how many pixels the camera actually has available — simply divide the field of view in feet by the total horizontal pixels of the camera to determine pixels per foot (PPF). The wider the field of view, the more each pixel is being stretched, and the fewer pixels available to see each point of the image. For example, using a 4MP camera with an image of 2688 pixels high will yield 67 PPF if the Horizontal Field of View is 40 feet. With sufficient lighting, 67 PPF is enough pixels to capture a person’s face or the license plate from a suspicious car.
5. Storage: Determine bandwidth and storage requirements and ensure you choose a network video recorder (NVR) that has the right number and size of hard drives for storing your data.
Jennifer Hackenburg is Product Marketing Manager for Dahua Technology. Request more information about the company at www.securityinfowatch.com/12101368.