5 things a surveillance installer should check before calling tech support
After many years in the megapixel surveillance business, our technical support team has seen it all. Polling them recently, we were able to put together a list of their “best hits”; that is, the most common mistakes and problem areas they encounter when talking to the integrator on the job. If integrators/installers are able to master these five areas, life for them - and the end user customer - is going to improve exponentially.
1). Network Basics: Static Addressing vs. ZeroConfig Addressing, etc.
All this really takes is a Network 101-level of understanding. No advanced knowledge is required to install the camera on a simple network (like a small office or home office environment).
Simply configure your network settings as usual, including IP address, subnet mask, gateway, and name server (if applicable). Then choose an open (unused) port on your network and assign it to the network camera.
After you configure your network settings, your port-forwarding settings must be configured on your router to enable proper forwarding and receiving of data from the camera while connecting from a remote location.
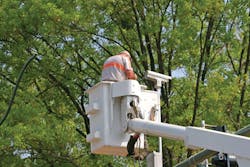
2). Optics: Understanding the Implications of Lens Selection
It is critical to have a thorough understanding of the level of impact lens selection - bad vs. good quality - will have on your resulting images, field-of-view and the viability of video for forensic analysis. Rule of Thumb #1: Analog video lenses should never be used with IP megapixel cameras.
3). The Differences Between MJPEG, MJPEG-4 and H.264
The installation of the network camera is just the first step in creating a working solution for the customer. The installer has to have a clear understanding of the differences between video compression algorithms and which one is most appropriate for the end-user’s security goals. There is no "one-size-fits-all" compression method for IP megapixel surveillance systems.
4). Image Optimization: Understanding What Adjustments are Necessary in Different Scenarios
The issue here is that most traditional analog installers have never had to access or set up anything within the camera’s software interface in order to optimize them. There simply was not the breadth of options or flexibility we have with today’s IP cameras.
Analog menu optimization takes place on an on-screen display (OSD), using physical buttons on the side of the camera to navigate around the menu (similar to how camcorders work today). IP camera optimization is performed using a graphical user interface (GUI) with numerous customizable settings and options.
The modern installer needs to consider IP camera-specific parameters such as shutter speed, gain control, iris settings, day vs. night settings, dynamic range requirements, IR illumination considerations, and more. These are just a few of the aspects that the analog installer does not have to deal with, or rather, deals with in a different way.
5). Basic Windows Operating System Understanding
The installer needs to know how to get around a Windows environment quickly and efficiently. Not to worry: This only requires basic knowledge of the OS, nothing advanced.
I think one of our Sales Engineers expressed it best when he said, “My motto has always been: It’s much easier to teach a ‘network guy’ cameras, than it is to teach a ‘camera guy’ networks.” As IP technology providers, we are attempting to reach out to our most challenging audience and, in general, the traditional analog folks have not shown a lot of enthusiasm for the lessons laid down here, but we’ll keep trying.
About the Author: Wendi Burke serves as director of global corporate communications for surveillance camera maker IQinVision.
About the Author

Wendi Burke
Director, Global Corporate Communications, IQinVision
Wendi Burke is director of global corporate communications for IQinVision.